Follow

My Favorite Eyebrow Products

Leave a Comment


Oh Eyebrows how we adore and hate you at the same time. 

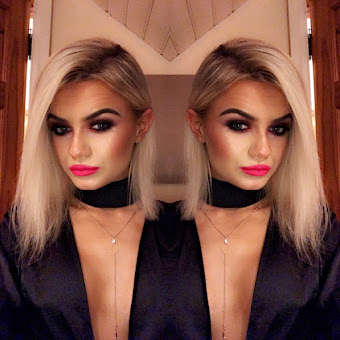
Eyebrows is what we all spend the most time on when doing our makeup, I no myself I can send up to 10 - 15 minutes on my brows and that is on a good day. They frustrate the hell out of me especially when you cant get the other twin sister to look the same. But oh when them girls or on fleek they make the rest of your face look like a dream.

So there is many different products you can use for your brows, ranging from pencils to dip pomade, but its to your preference what you prefer to use, then it ranges from different brands, every makeup brand have eyebrow products and again its what brand you prefer and can afford to buy.

Then some people including myself like to re- shape and tidy up my brows once I have them filled in and to do that I like to use a pencil or concealer.


See below for my list of favorite's, how to use them and where to purchase them:


Anastasia Beverly Hills:


The Queen of Eyebrows, lets take a minute to appreciate this lady ( Pause for a moment... lol)

Two main products from this brand which are my ultimate fav, 

  • Brow Definer in Soft Brown:
This is a triangular pencil which fits perfectly in order to fill in the eyebrow due to the shape, the way I use this pencil is I Start of first outlining my brow with the sharpest part of the pencil and then I Fill the brow in using the back side of the pencil creating hair like strokes.

  • Dipbrow Pomade in Soft Brown

This is a thick creamy like substance which is waterproof and fast drying, I use this by again firstly drawing the outline of my brow first and than filling it in with a light hand, going heavy at the middle and end of the brow and easing into a softer motion at the top of the brow.

Mac Cosmetics:

Mac never disappoint with any of their products and their brow products are just as amazing as ABH,

  • Mac's Fluidline in Deep Dark Brunette
Guys this is just like the ABH dipbrow pomade only difference is that the formula is a bit more drying than the ABH but is still amazing, again  I use this by firstly drawing the outline of my brow first and then filling it in with a light hand, going heavy at the middle and end of the brow and easing into a softer motion at the top of the brow.

Cleaning up the brow, reshaping after been filled in &  HD Look:

NYX Cosmetics:

  • NXY Wonder Pencil
This is a great product, its just like a conceal in pencil form, I use it to reshape my brow to how I want to look after I have them filled in, I Just simply trace the shape above and below my brow and soften it down with a flat eyeshadow brow like a MAC 212 or the tip of a beauty blender and also its a great way to clean up any mistake which were made when drawing on the brow and for making the brow stand out giving it the HD look.

MAC Cosmetics:

Pro Longwear Concealer:

One of Mac's Best known products, I use it for the exact same thing as the NYX pencil I grab a flat eye shadow brush, dip it into the product, now you only need a small amount as this product is thick and creamy it goes along way, and I trace it above and below my brow to reshape, tidy up and give the HD effect.

Once I have the brows on fleek I use the benefit gimmie brow just to finish them off and set in place and than you will be rocking a beautiful set of twins on your face.


Now if you are interested in purchasing any of the above products check the list below to find out where you can purchase them in Ireland.

Where to Buy:


Hope this was of use to all you brow lovers.

Claire 
xxxxx


SHARE:
0 comments

Death by Chocolate Cake

1 comment
Hi Guys,

So its the boyfriends Birthday and being the good girlfriend that I am, I decided to make him a birthday cake.

Both of us are very healthy throughout the week, we are very much into the healthy eating and keeping the body clean but come on everyone needs to have a cheat day at least once a week, ours is usually on a Sunday. So this week we our spoiling ourselves with homemade Death by Chocolate cake.

I never used to be into the whole baking scene but over the last year I have really started to get into it and enjoy it especially when you get to make cakes that turn out looking like this.

Guys if you want to know how to achieve this Death by Chocolate cake just continue reading and give it a try and like me you will get a great sense of satisfaction when it turns out looking so delicious.

Death By Chocolate Cake:

So your going to need the following:

Cake mixture:


  • 11 ounces of Caster Sugar
  • 8 eggs
  • 7 ounces of Flour
  • 4 ounces Coco powder
  • Tsp of baking powder
  • pinch of salt
  • 3.5 ounces of Stork ( Butter)
  • tsp Vanilla Extract

Chocolate mousse:


  • 3 large bars of Chocolate (I like to use the Lindt Extra Creamy bars)
  • 6 eggs
  • 6 ounces unsalted butter

For decoration:


  • 5 boxes of Kinder maxis
  • Box of flakes
  • 2 Bags of small kinder eggs
  • Large bag of white buttons
  • Large bag of Mini Eggs
  • 1 Large Kinder egg


Method:


  • First of all your better starting off  with preparing your cake tins, line them with grease proof paper and a little butter to make the tins non stick. 
  • Than start into making your mousse as you need to leave it to set for an hour or two.
  • Boil the kettle and pour the boiling water into a pot and place it on the cooker at a low heat.
  • Break your chocolate bars into a bowl and place that bowl on top of the pot to let the chocolate melt.
  • while that is melting separate the egg whites and place the yolks into the melted chocolate and leave the egg whites to one side until later. Stir until eggs yolks have fully melted into the chocolate.
  • When this is done add the 6 ounces of unsalted butter to this mixture, you will be better off cutting the butter into squares before adding as it will make it easier to melt. 
  • When all these ingredients have combined leave it to sit while you whisk the egg whites.
  • Mix the egg whites with your hand mixer until you can hold the bowl upside down and they don't fall out. 
  • When they are done add the chocolate mixture to the egg whites until it is fully combined, leave it on the counter until it is cool and than place in the fridge until it is at a good sticky combination.


For your cake mixture, 

  • Start off by mixing together your 11 ounces of Caster sugar and your 8 eggs, use a Kitchen Aid or if you don't have one a hand mixer will do, mix these ingredients for about 10 minutes until you can make the figure 8 appear onto of the mixture and it stays.
  • Than in a separate bowl mix together all your dry ingredients, which is your 7 ounces of flour, 4 ounces of coco powder 1 tsp of baking powder and your pinch of salt, mix them together with a spoon.
  • Grab your sieve and sieve the dry ingredients into the eggs and sugar mixture and fold them in with a wooden spoon or a baking spatula or what ever you have available.
  • Add the mixture to your two prepared cake tins and place them in the oven at 160 degrees for about 25 to 30 minutes. 
  • When done remove them from cake tins and place them on a wire trays to cool.

Decoration:

  • When your cake has cooled down and your mixture is set, its time for the fun part and that is the decorating.
  • Now this can get a little messy so make sure you have something under the cake, Place your two cake slices upside town and get your canned fruit and drain the juice into a bowl and than spread it over both sides of the cake as this will keep the cake moist.
  • Than place some of your chocolate mousse into the middle of the cake and put the top part on top of the bottom and layer the mousse all over the cake.
  • Now depending on what sweets or bars you are using to go around the outside of the cake, here I used Kinder maxis and when I have them all surrounding the cake I quickly grab a ribbon and tie it until the cake is in place and the bars don't move. Than get your flakes and cover the top of the cake until you cant see the mousse than get the rest of your sweets and decorate to your hearts content.


when complete and looking amazing leave it for an hour or two until the cake and all the sweets have set.

Than grab a plate and enjoy the heavenly goodness and a cup of tea of course.

I hope you can follow this step by step and if you take on the challenge and make it tag me in your pictures on Instagram as I would love to see how you got on or leave me a comment if you have any questions, I would be happy to answer them.

Happy cooking Guys. :)

Claire

xxxx

SHARE:
1 comments

My Favorite Charlotte Tilbury Products

Leave a Comment


Oh my word, I was an ultimate Mac girl and I still am but Charlotte Tilbury has stolen a massive chunk of my heart with some of her products. They are divine and if you haven't used any of them yet and your not sure on what to try I will list you some of my current favorites, which will be a staple in my makeup bag from now on.

Charlotte Tilbury Magic Cream:
what a stunning product and it is said to be one of her flagship products and I can see why.
It claims to be a multi-tasking cream, acting as an anti age cream and a mini facial in a jar, in my opinion it lives up to the hype, I personally love it as a primer underneath my makeup and I feel like it leaves a fresh and dewy look to my skin.

Charlotte Tilbury Magic Foundation:
This is without doubt my new all time favorite foundation, it is so light weight yet has such amazing coverage and blends so effortlessly and has great lasting power on the skin, I love this foundation so much and there is such a great range of colors to suit every skin type, this foundation I would say is a medium to full coverage and leaves an amazing dewy look to the skin especially with the magic cream underneath, these two products together = AMAZING. Oh also lets throw the magic foundation brush in here because its an ultimate must have with this foundation and my new fav brush to apply all foundations.

Charlotte's Lipstick in Penelope Pink and Pillow Tak Lip Pencil

Such a dreamy combo, this lip liner, well not just this one but all her lip liners are amazing and kind of knock Mac off the radar a lil bit, they claim to re-size and re-shape your lips without trying and I wouldn't have big lips at all so I can safely say that they do make a massive difference without over drawing them. 
The lipsticks are also just as amazing and sit gorgeous on top of the lip pencil, they are lovely and creamy and not one bit drying on the lips like some other lipsticks, they have an amazing color range so I urge you all to go out and try these.

Guys I know these products are expensive and if you are lucky enough to be able to purchase them they are fab, for those that cant afford to dish out that sort of money for makeup I will search high and low to find dupes for all listed and I will do another blog post on them.

Claire x x x


SHARE:
0 comments
Next PostNewer Posts Home
BLOG TEMPLATE CREATED BY pipdig